Would you like to make this site your homepage? It's fast and easy...
Yes, Please make this my home page!
Ok, so you want to build a lightsaber. Here is how I built mine, and some
ideas for people who have less experience in a wood working shop. Just to let
you know, I'm 16 and not THE most experienced craftsman out there. Have fun.

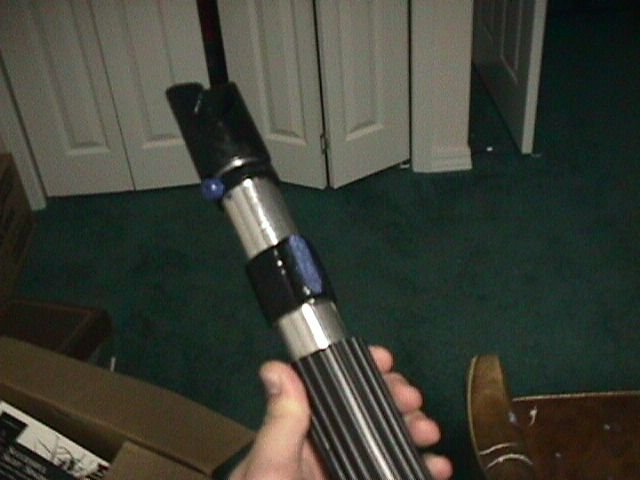
Here are the parts that will be referred to:
 |
 |
 |
 |
| Activation Lever (AL) |
Emitter Head (EH) |
Handle |
Recharge Port (RP) |
- Ok, now we are ready to begin. First of all, most of the parts are made
from wood. This lightsaber is meant for display only, if you wish something
to play around with, I suggest oak instead of pine.
- To start, I obtained a 13" long piece of pine closet rod (1.25"
diameter). This was used as the shaft (forgive the wording, that's all I
could think of). To create the AL, EH, Handle, and RP, I used a piece of 2x4
pine.
- Taking the 2x4, I drilled Seven 1.25" holes in it, leaving about
1" between each hole.
- Using a band saw, I cut around these holes leaving about 1/4" of wood
to make a ring.
- Taking 2 of these rings, I stacked them on top of each other and glued
them together to make an even longer ring. I carved a pattern (whatever your
fancy is) into the ring with a dremel hand tool, and this made the EH.
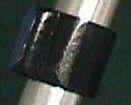
- I took one ring and pasted (carpenters glue) a 1/4" tall, 2"
long (the length of the ring), 1/2" wide piece of wood onto it to make
the activation lever. To make the activation strip on top (of the squarish
piece) of the activation lever, I pasted a piece of rubber that had a
diagonal check pattern (or crisscross pattern, whatever you like) to it and
painted it blue (later)
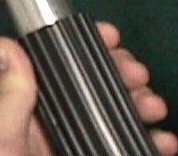
- To make the handle, i stacked and glued 3 rings giving me a length of approximately
6". I found some floor mat material at a local hardware store (Lowe's)
that I was perfect for the job. It had ridges that ran the length of it. I
cut a piece that would wrap around this handle (with the ridges running
vertically) and glued it in place (it take a long time, it has a tendency to
not stick, you might try super glue).
- For the recharge port (in my opinion, the easiest piece), I use a 1/4 of
one of the rings. I took a dowel and cut a 1/4" tall piece of it,
drilled a small hole through the middle, and glued it on.
- To make the shaft have a metallic look, I used a roll of aluminum foil
tape (a.k.a. Air Duct tape).
- I sanded all of the pieces and painted them (whatever color you like, i
used blue and black).
- I assembled all the pieces by sliding them onto the shaft and gluing them
in place.
That might sound difficult, but it really isn't. If you have really bad
mechanical skills, i suggest you use this method:
- Substitute a 13", 1.25" diameter piece of pvc pipe for the
shaft.
- Substitute a piece of pvc slightly larger than the shaft (so the pieces
can slide on) for the AL, EH, RP, and Handle.
There you are. Have fun, and May the Force Be With You.
